
Start here
Getting started with your QuiQSol workspace
Create your workspace, find your way around, set your company details, invite your team and understand your trial and billing.
Prerequisites
- About 15 minutes
- Your work email and phone number
- The email addresses of the teammates you want to bring in
1. Create your workspace
Go to app.quiqsol.com/signup, or start from quiqsol.com/sme to sign up with the small business offer. Fill in:
- Company name: your business name as customers know it.
- Workspace subdomain: your workspace address, for example
zuri-fashion. Your team uses it to sign in, and it appears in your public links, so keep it short. - First name, last name and email: you become the workspace owner and first Administrator.
- Phone number: a Nigerian number such as 0803 123 4567 works as typed. Turn on Send me setup tips and offers on WhatsApp only if you want them; it is off by default.
- Password: the bar under the field turns green at Strong.
Click Create workspace. It takes a few seconds because QuiQSol also loads a sample business for you to explore.
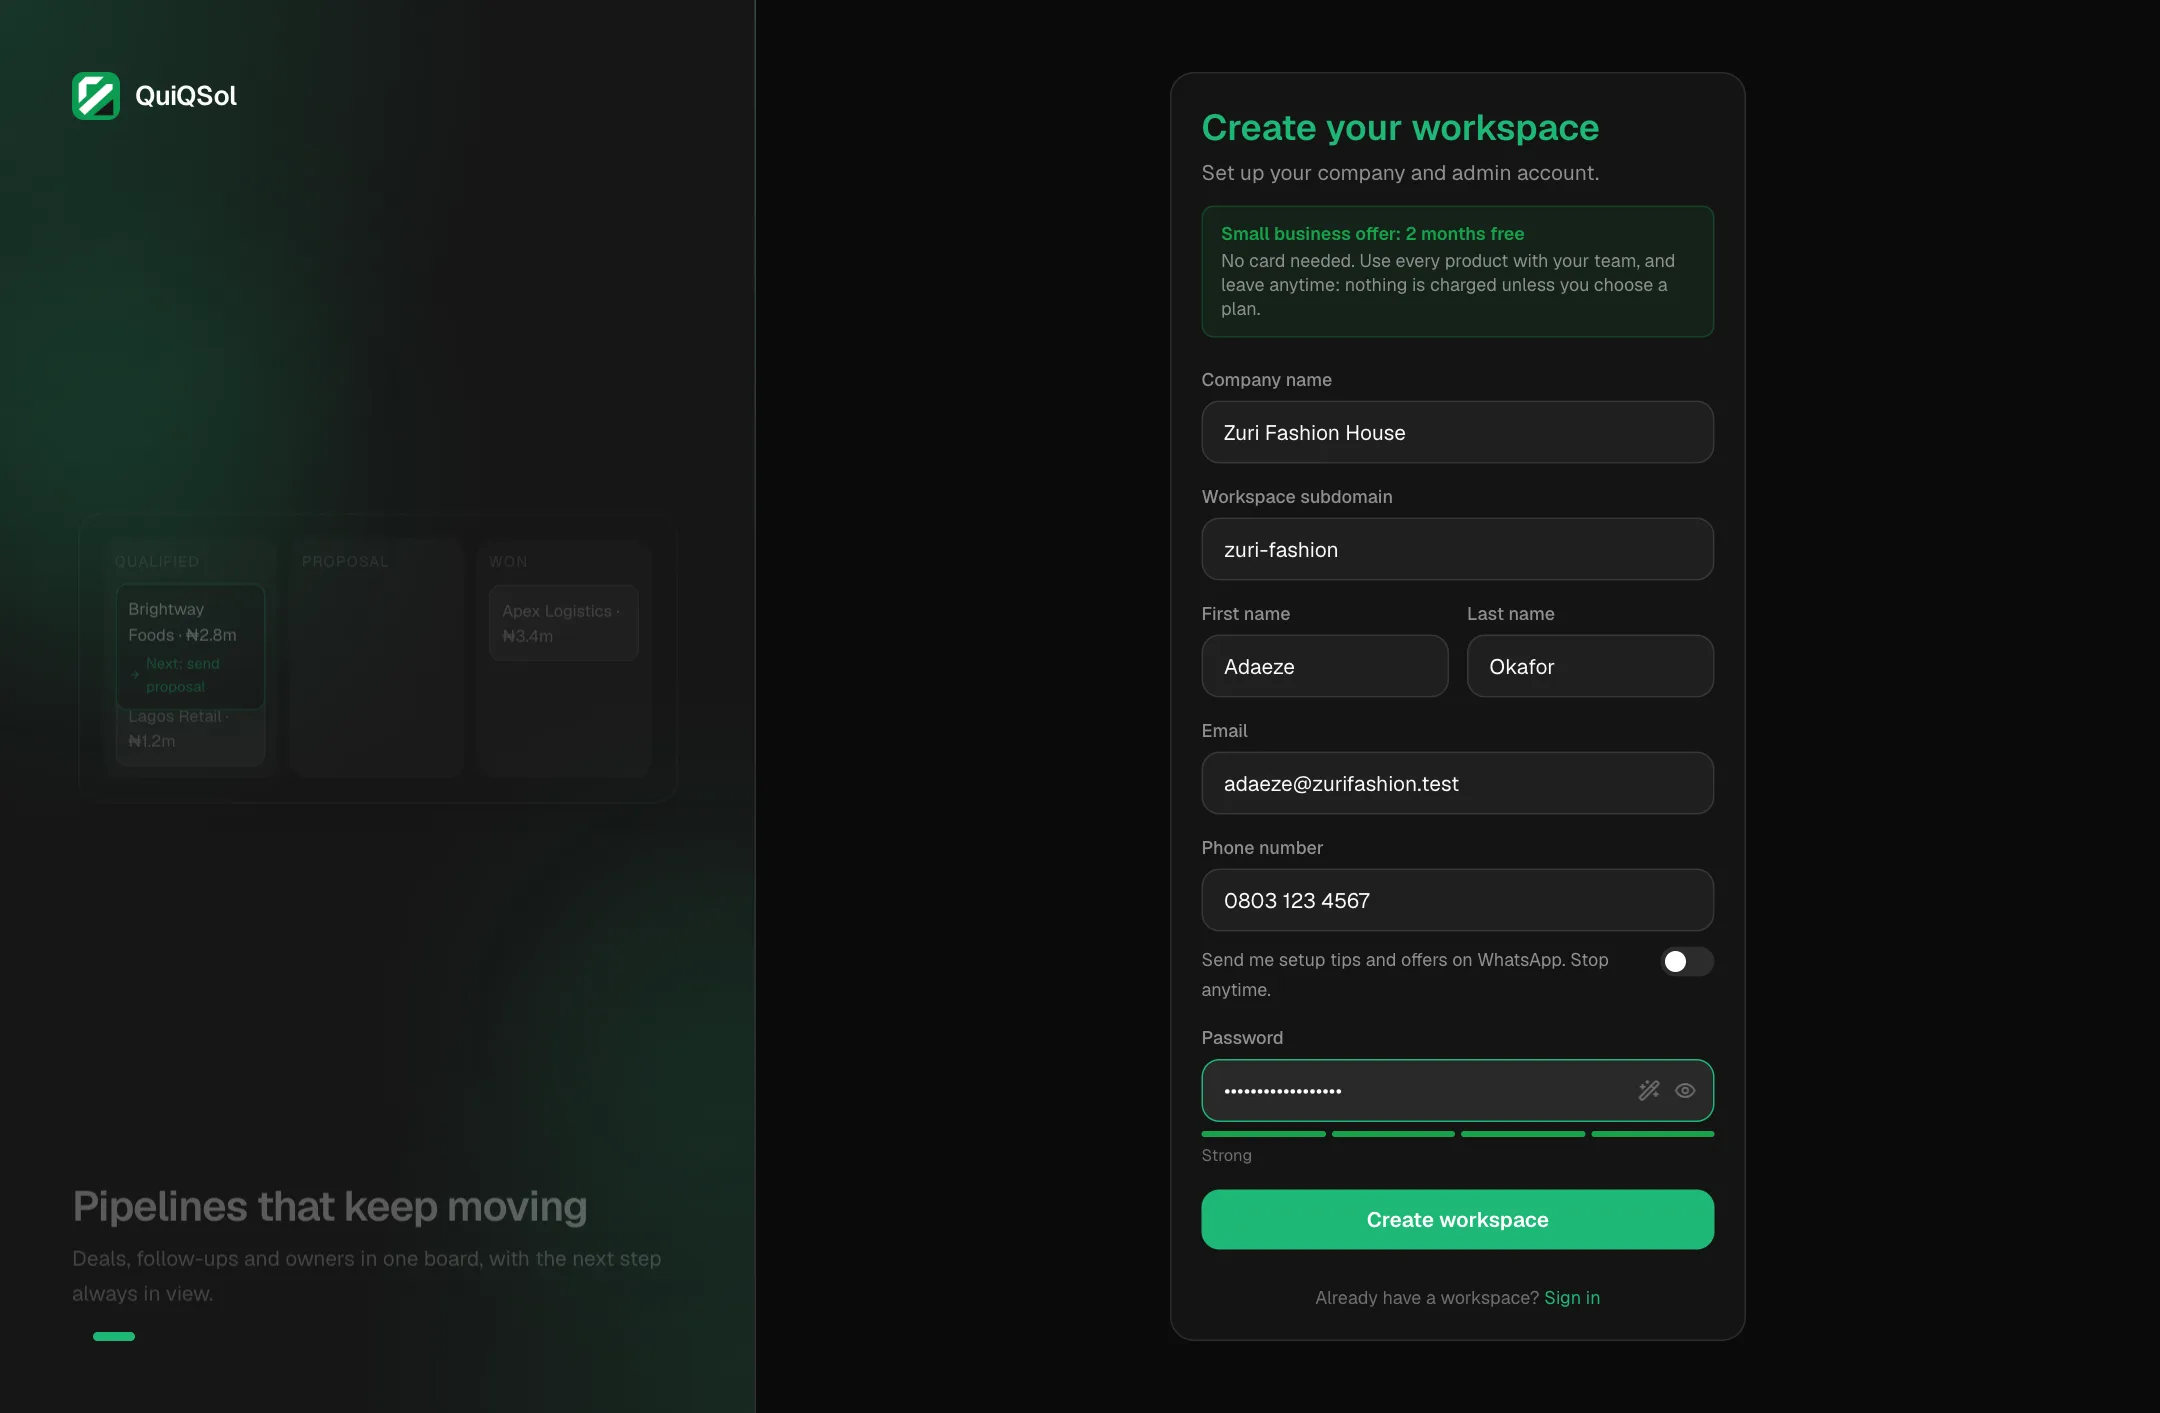 The sign-up page with the small business offer applied
Small business offer
Signing up from quiqsol.com/sme shows Small business offer: 2 months free at the top of the form. No card is needed, and nothing is charged unless you choose a plan.
2. Answer three quick questions
A short setup wizard opens straight after sign-up. Every step is optional, and Skip setup takes you straight in.
- Tell us about your business: pick your industry and company size.
- What brings you to QuiQSol?: tick what you want to manage first. Those apps are pinned as favourites so they are one click away.
- Bring your team along: type your teammates' emails, separated by commas. They get an invite by email.
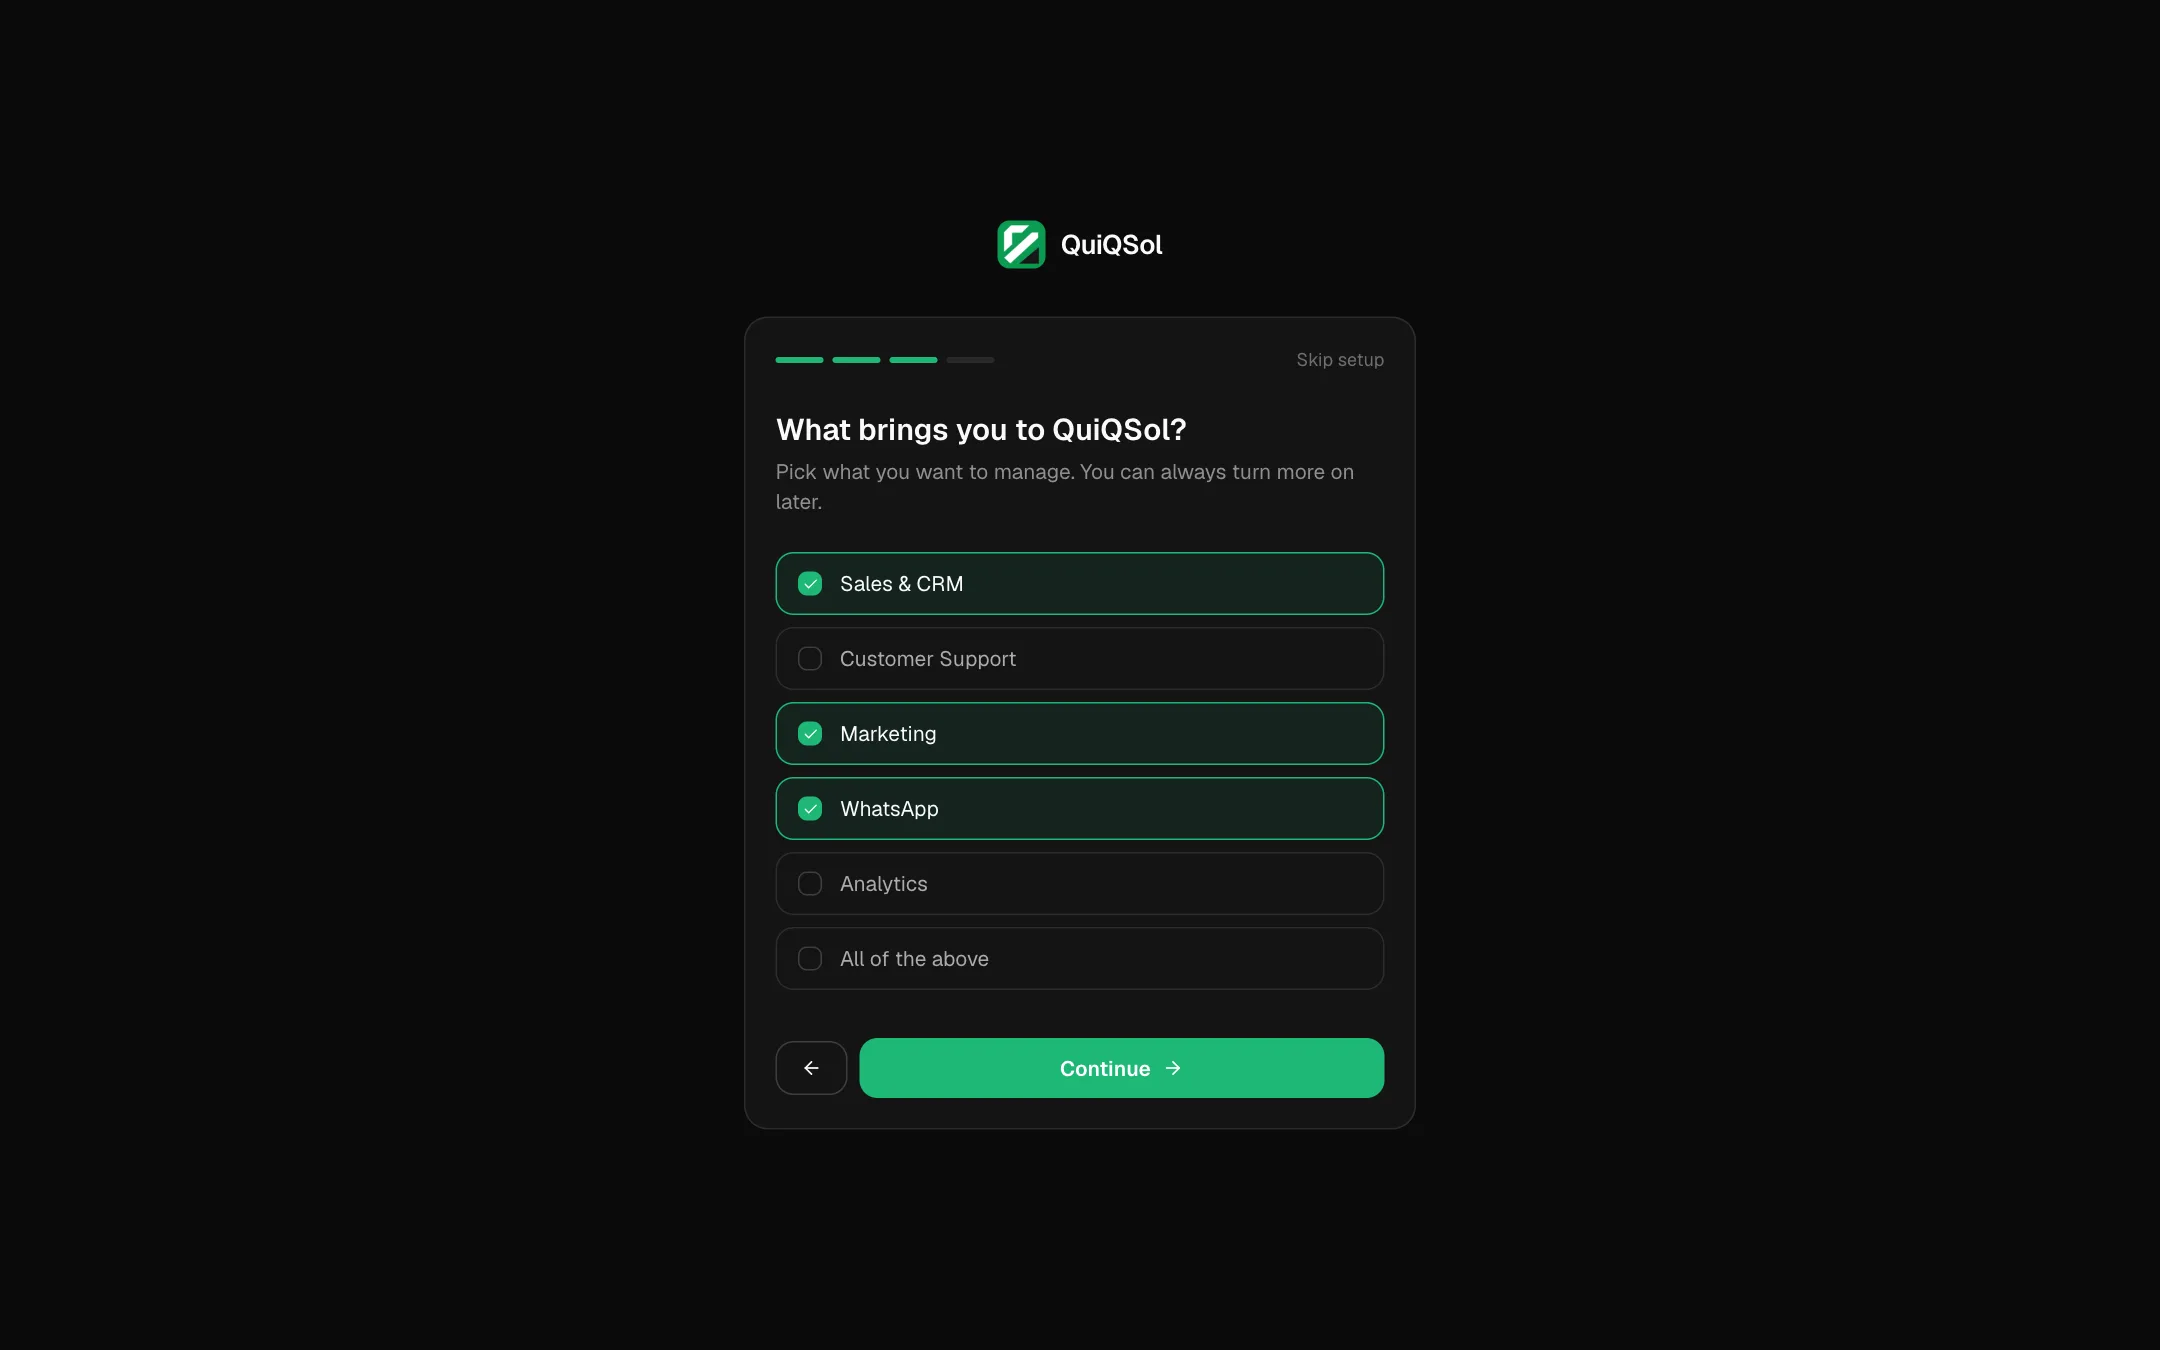 Choosing what to manage first
Note
Teammates invited from the wizard join as Administrators. Change anyone's role later in Settings → Users (step 7).
3. Verify your email
An amber bar at the top reads Please verify your email address. Open the email from QuiQSol and click the link. If it has not arrived, click Resend verification email on the right of that bar.
4. Find your way around
Your home screen greets you by name and shows the day at a glance: open tickets, open pipeline, win rate, what needs you, your tasks for today and the newest contacts. The New buttons at the top right create a contact, deal, task or meeting from anywhere.
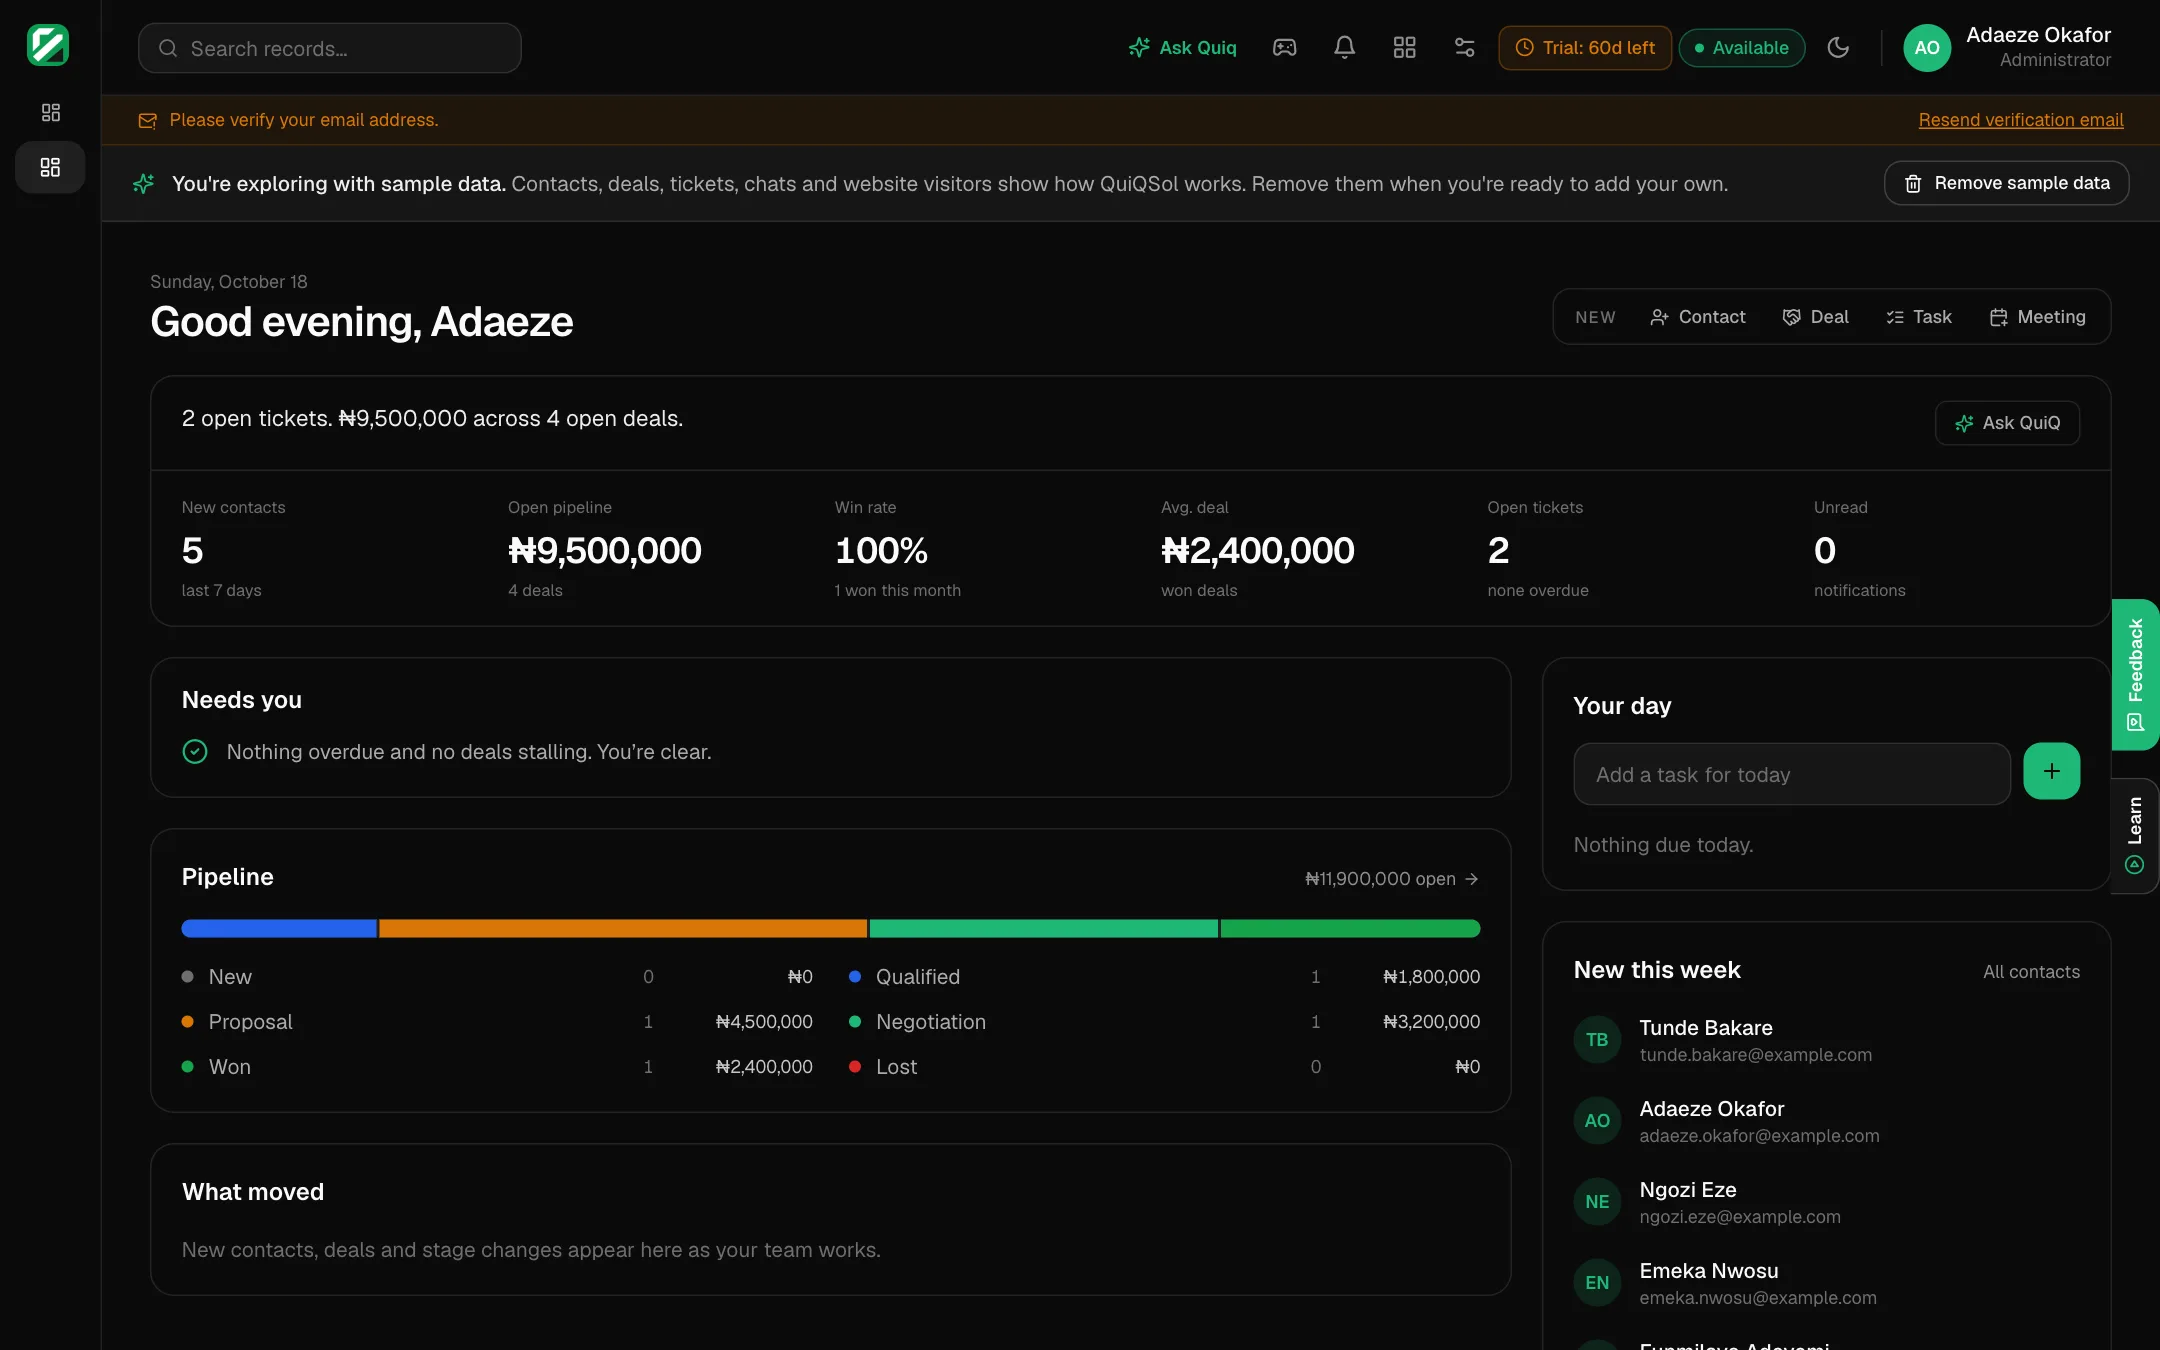 The QuiQSol home screen
A ten-step tour starts on your first visit. Close it any time and replay it from your profile menu with Retake the Tour.
The top bar is the same on every screen:
 The top bar, numbered
- Search: find any contact, deal, ticket or conversation.
- Ask Quiq: ask how to do something in QuiQSol and get an answer from these guides.
- QuiQ Space: message your teammates without leaving QuiQSol.
- Notifications: assignments, mentions and updates.
- Apps: every QuiQSol product in one menu.
- Settings: company, team, roles, security and each product's setup.
- Trial: days left in your trial. Click it to see your plan options.
- Available: click to switch to Away. Away keeps new chats and tickets from being assigned to you while you stay signed in.
- Theme: switch between light and dark.
- Your account: profile, plan, appearance and help.
Click the Apps icon to open any product. Manage favorites in Workspace at the bottom pins the ones you use most.
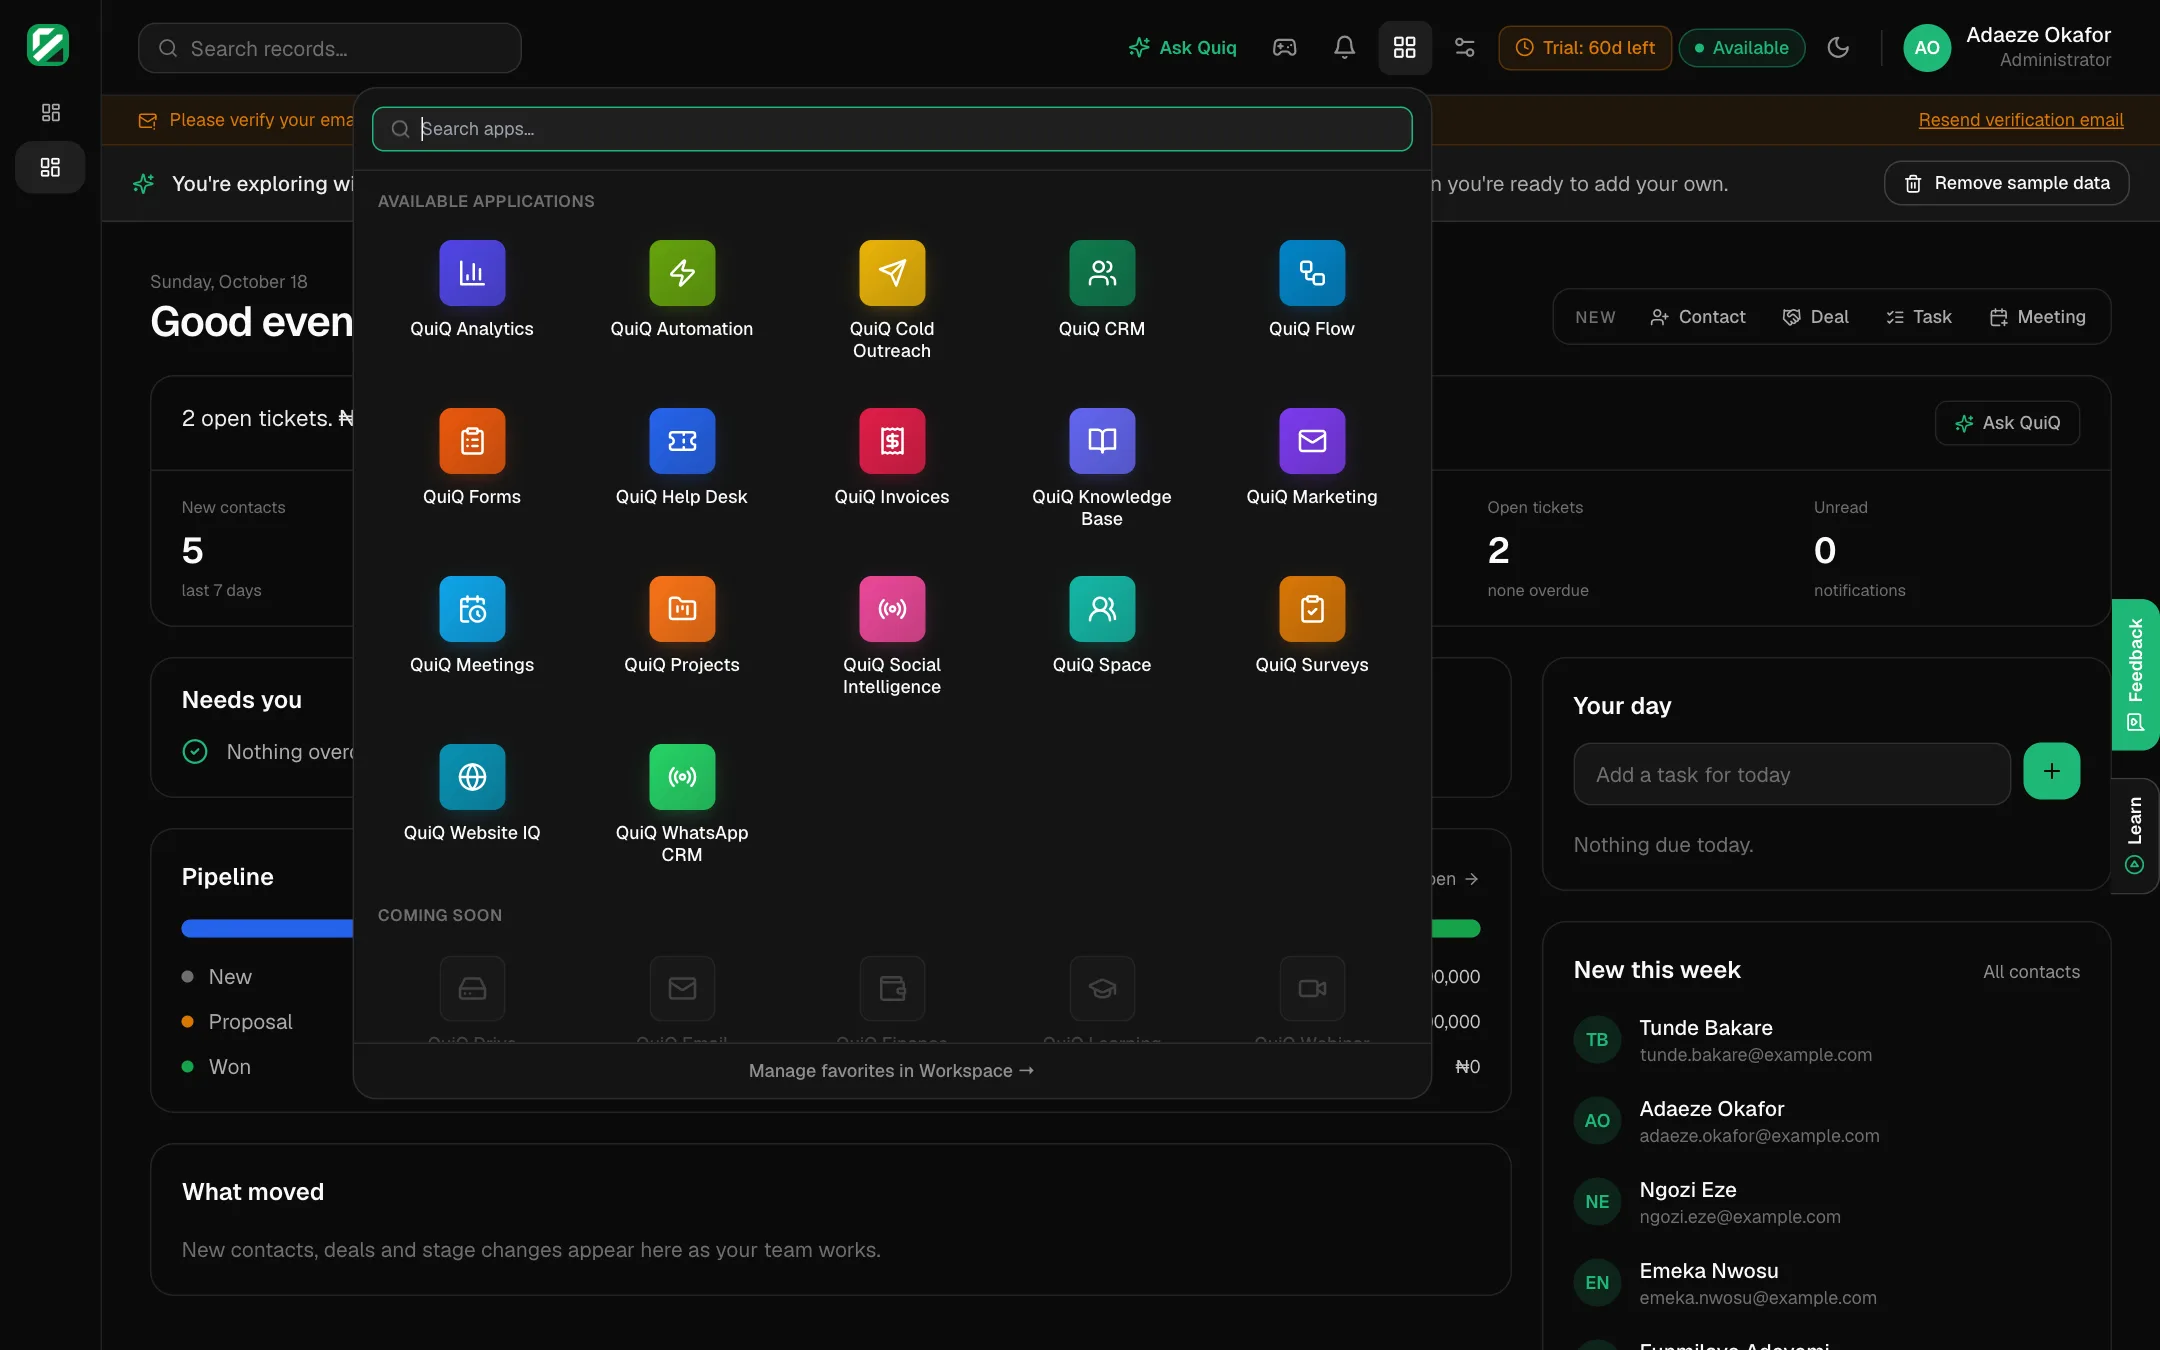 The Apps menu
The two tabs on the right edge of every screen are Feedback, to tell us what to fix or build, and Learn, with short videos and these guides.
5. Explore with sample data, then clear it
New workspaces open on a realistic sample business: contacts, deals, tickets, chats and website visitors. Click around freely; nothing here reaches a real customer.
When you are ready for your own data, click Remove sample data in the bar at the top. Only the sample records go; anything you added stays.
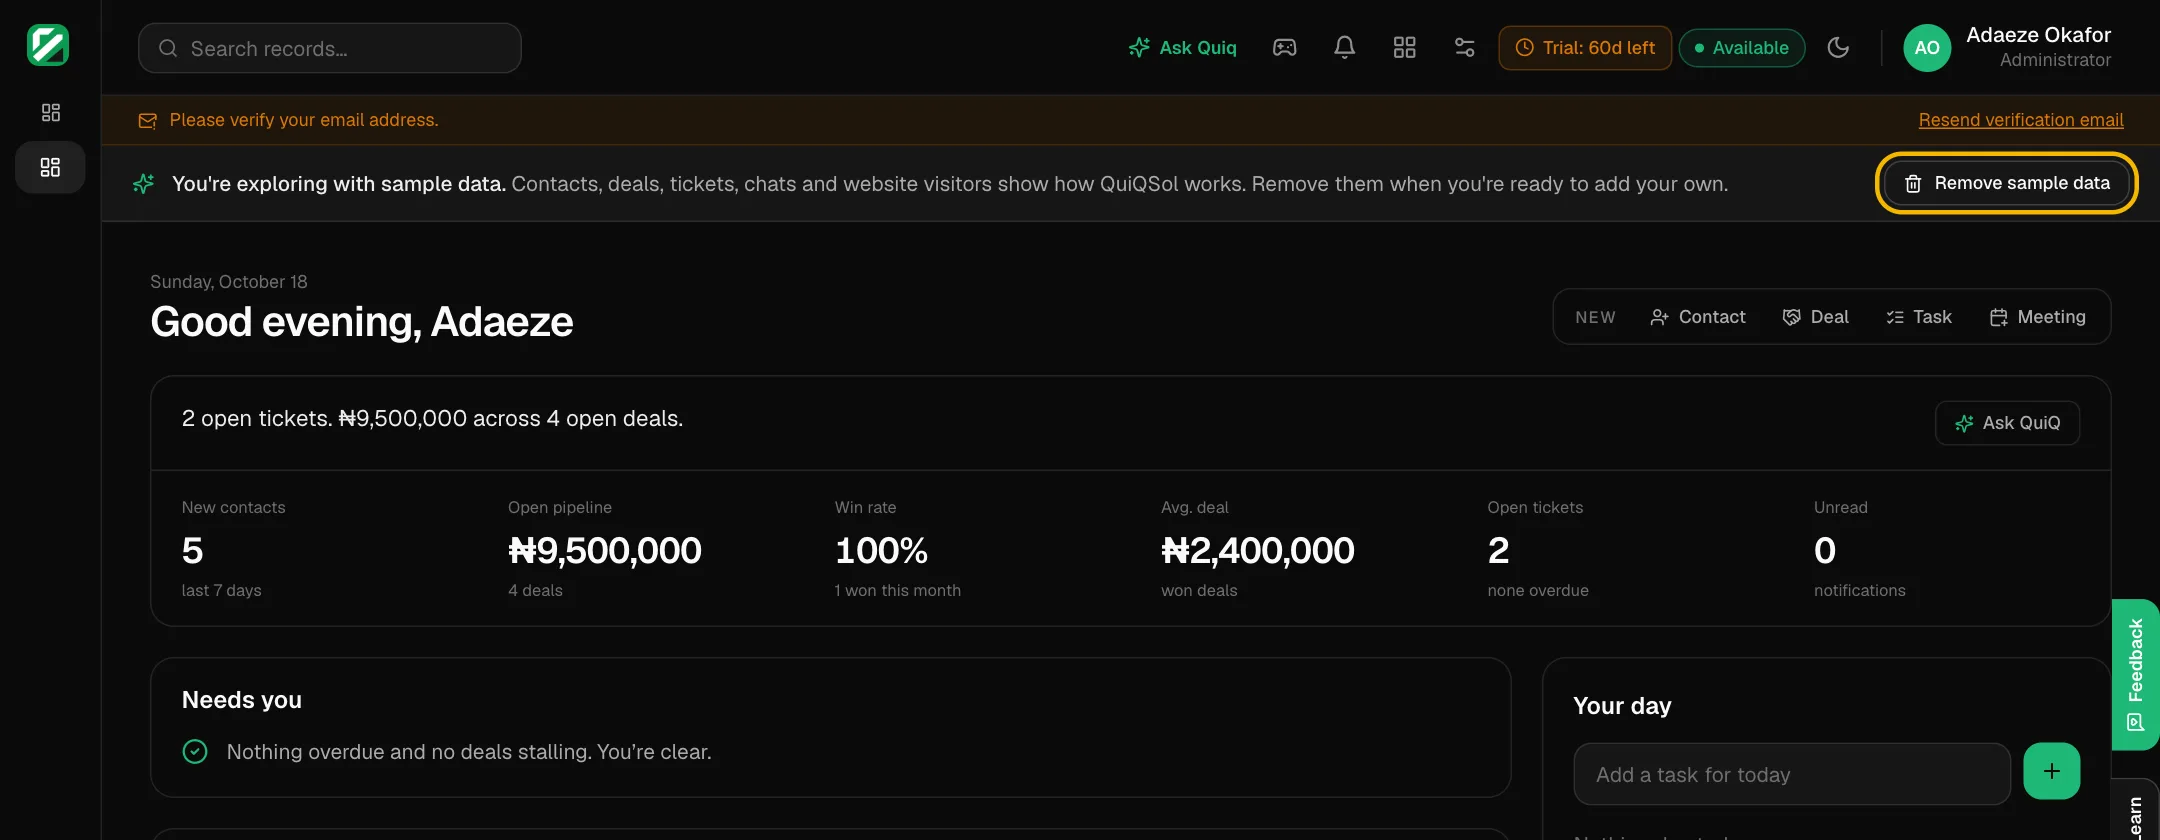 The sample data bar and its Remove button
6. Set your company details
Open Settings (the sliders icon), then Company Settings.
- Company profile: your name and logo appear on invoice and estimate PDFs and on your public pages. Click Upload logo to add yours.
- Timezone and currency: a workspace created with a Nigerian phone number starts in Naira and Lagos time. Change either here if you sell in another currency.
- Business hours: switch on Set business hours to tell QuiQSol when you are open. WhatsApp routing, the after-hours auto reply and Help Desk response targets follow this schedule.
- Branding: your colours for the emails QuiQSol sends on your behalf.
Click Save changes at the bottom of the page.
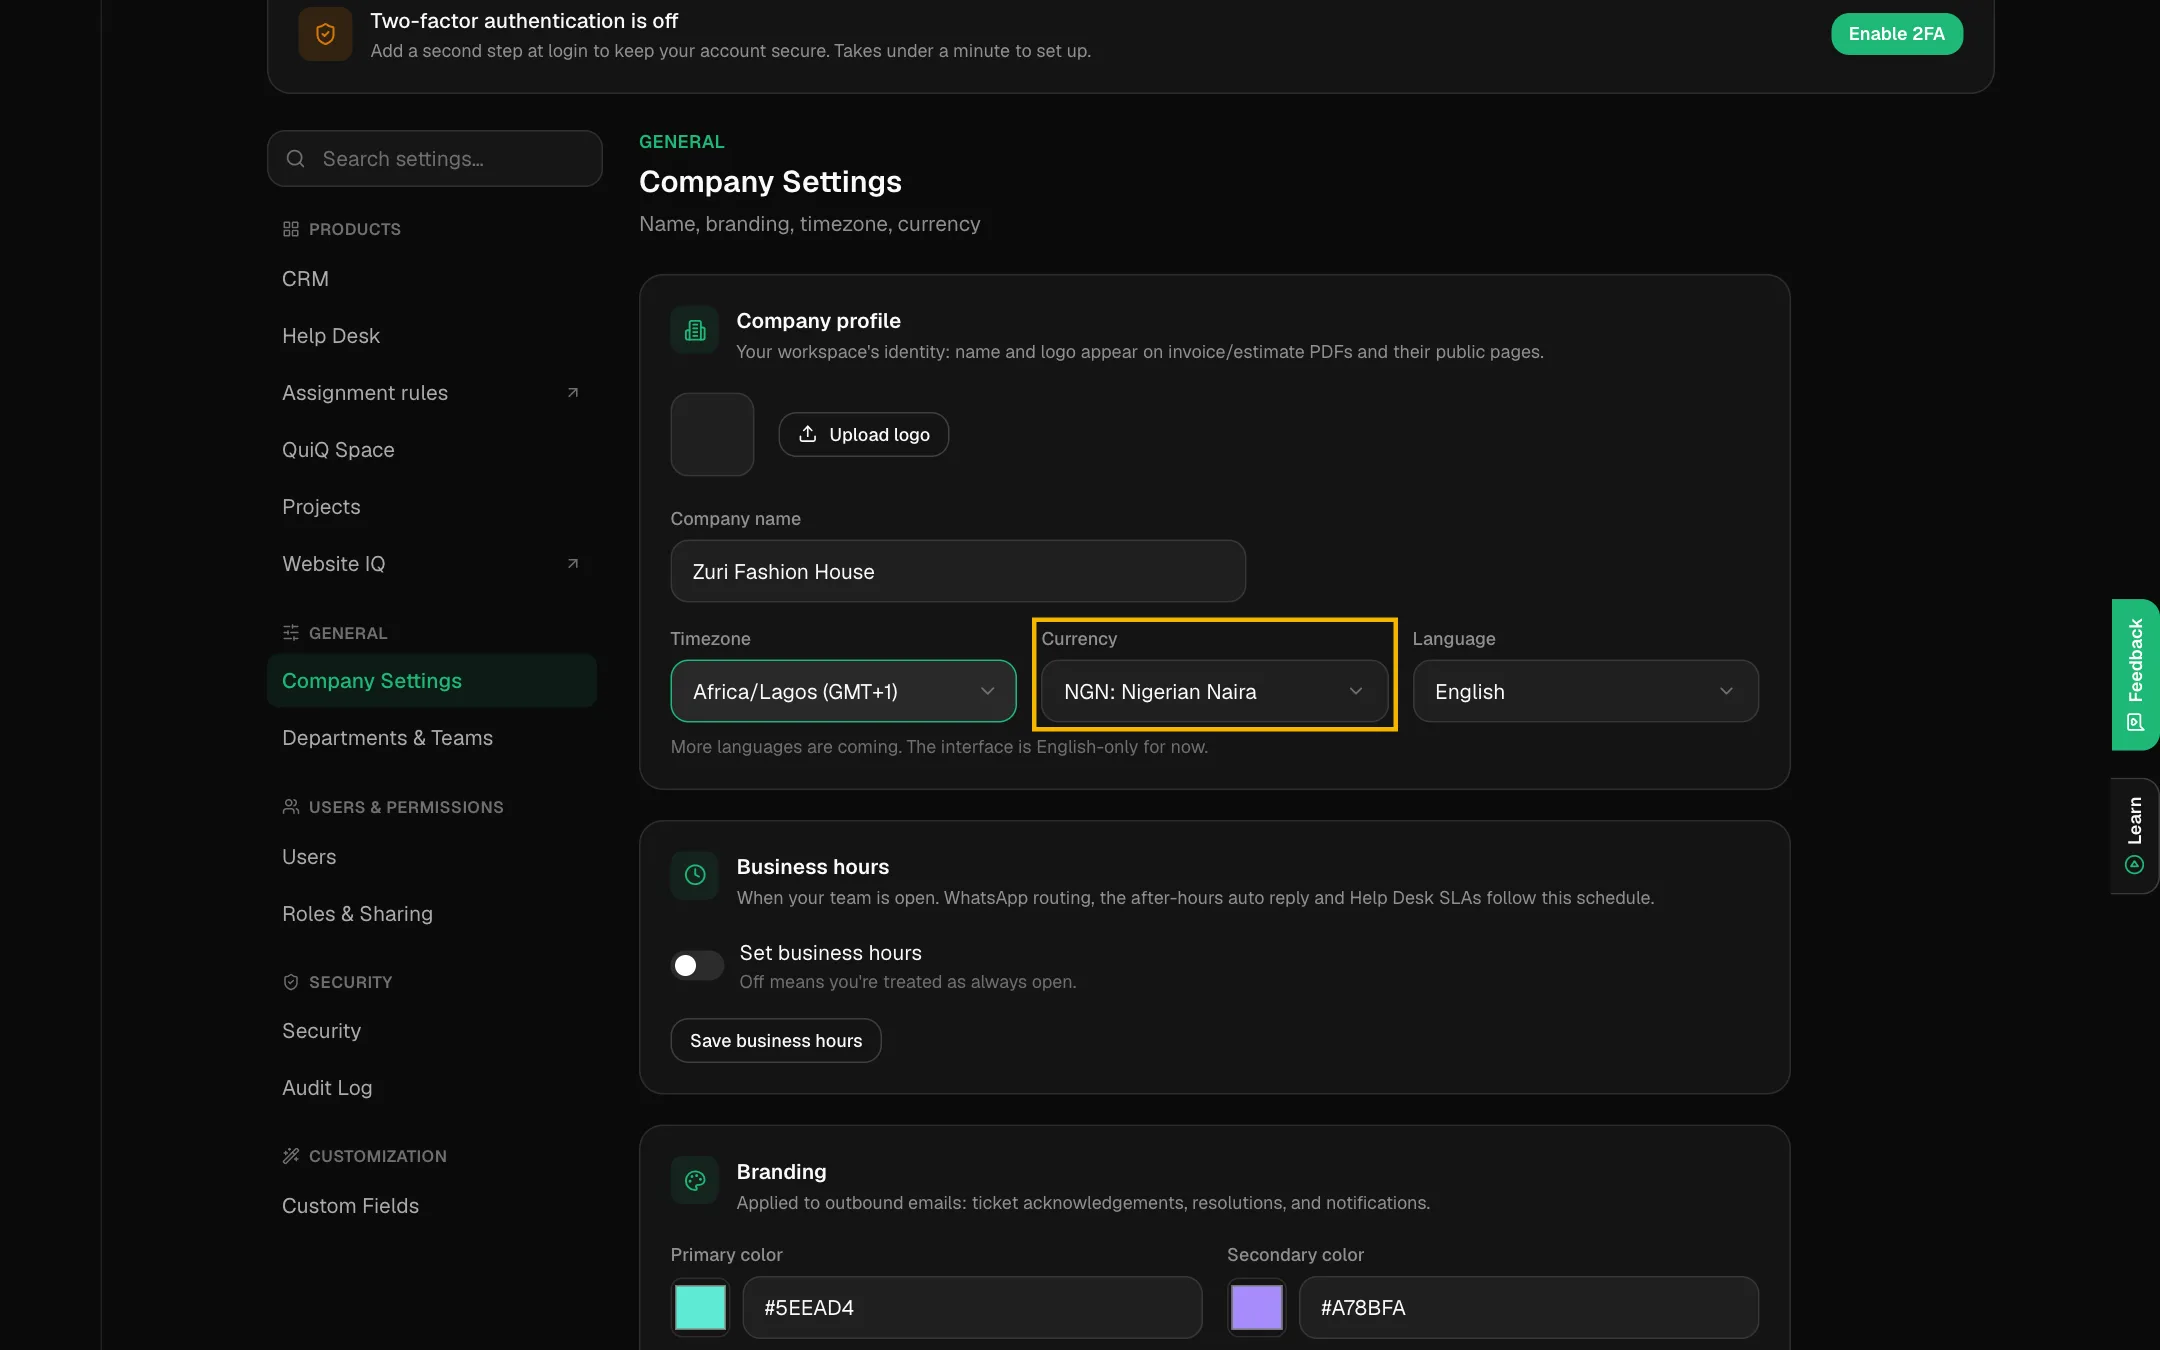 Company Settings with currency set to Naira
7. Invite your team and choose roles
Open Settings → Users and click Invite teammate. Enter their first name, last name and email, choose a Role, then click Send invite. They get an email to set their password and join.
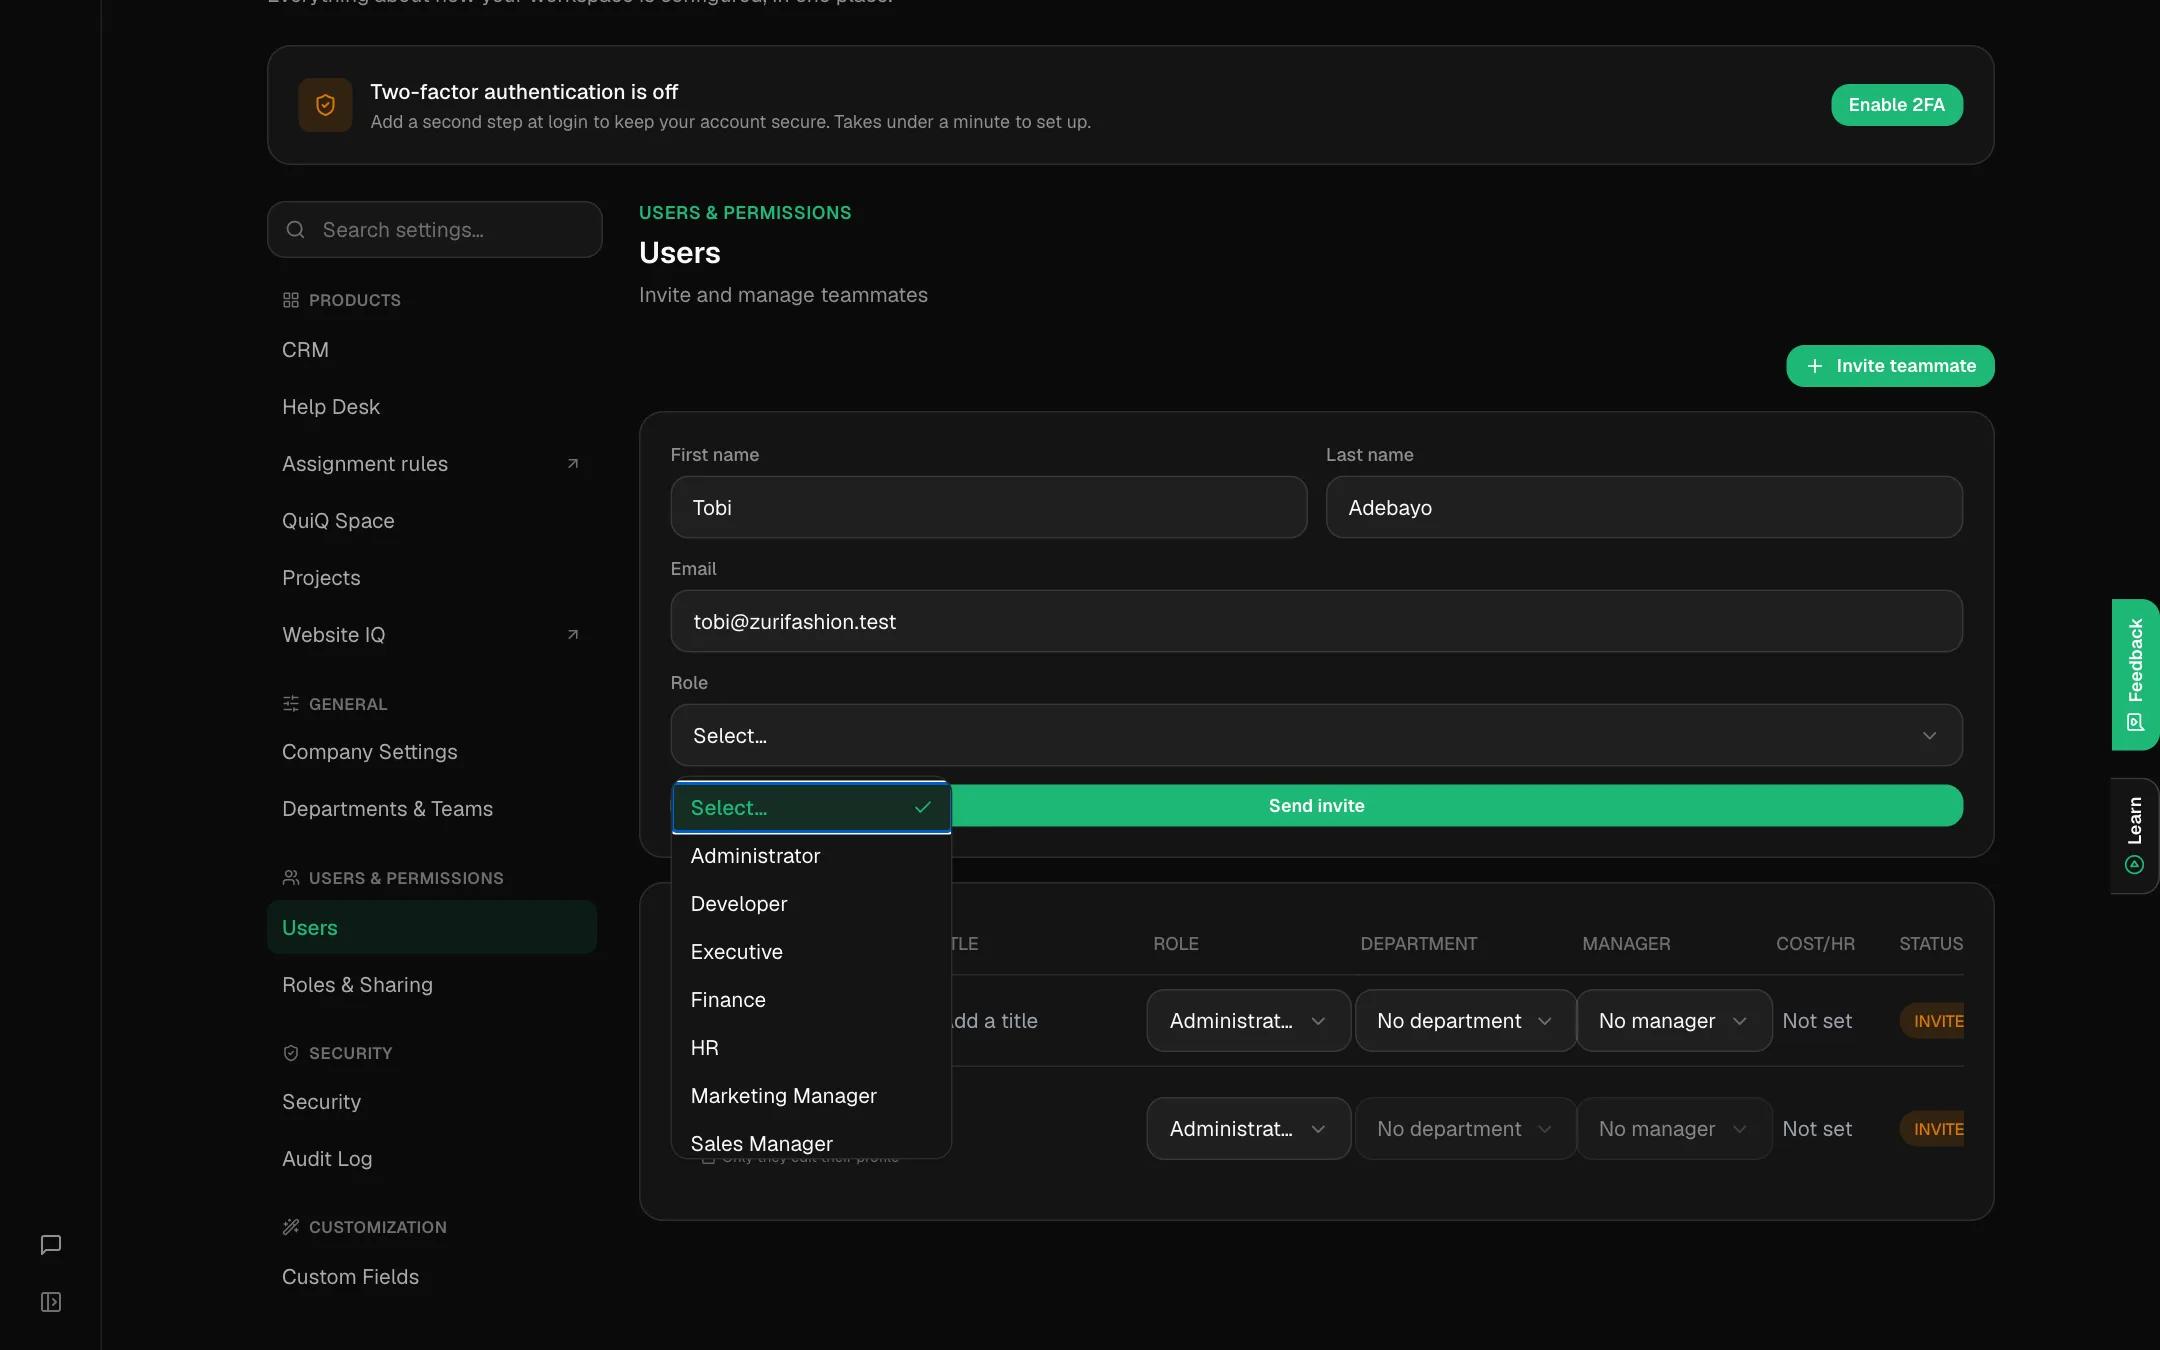 Inviting a teammate and choosing a role
Pick the role that matches the job. Each one opens the right apps and hides the rest:
- Administrator: everything, including billing and settings.
- Executive: sees everything, changes nothing.
- Sales Manager: CRM, Invoices, Meetings, Analytics and Automation for their team.
- Sales Representative: their own contacts, deals and meetings.
- Marketing Manager: Marketing, WhatsApp, Social Intelligence, Forms, Surveys and Analytics.
- Support Manager: their team's tickets and conversations, the Knowledge Base and Analytics.
- Support Agent: their own tickets and conversations, and the Knowledge Base.
- WhatsApp Support Agent: their own WhatsApp chats and the Knowledge Base.
- Finance: Invoices, CRM and Analytics.
- HR: users and teams.
- Developer: API keys, Automation and Flow.
To see or change exactly what a role can do, open Settings → Roles & Sharing and click Edit on that role. Settings → Departments & Teams groups people for routing and reporting when you grow.
From the Users list you can also Resend invite, Suspend someone temporarily or Remove them.
Seats
Each active teammate uses a seat. Your trial includes 2 seats, and paid plans start at 2 seats. Add more seats on the Billing page when you invite more people.
8. Protect your account
Open Settings → Security and switch on two-factor authentication. Choose an Authenticator app (recommended), an Email code or an SMS code. You also change your password here.
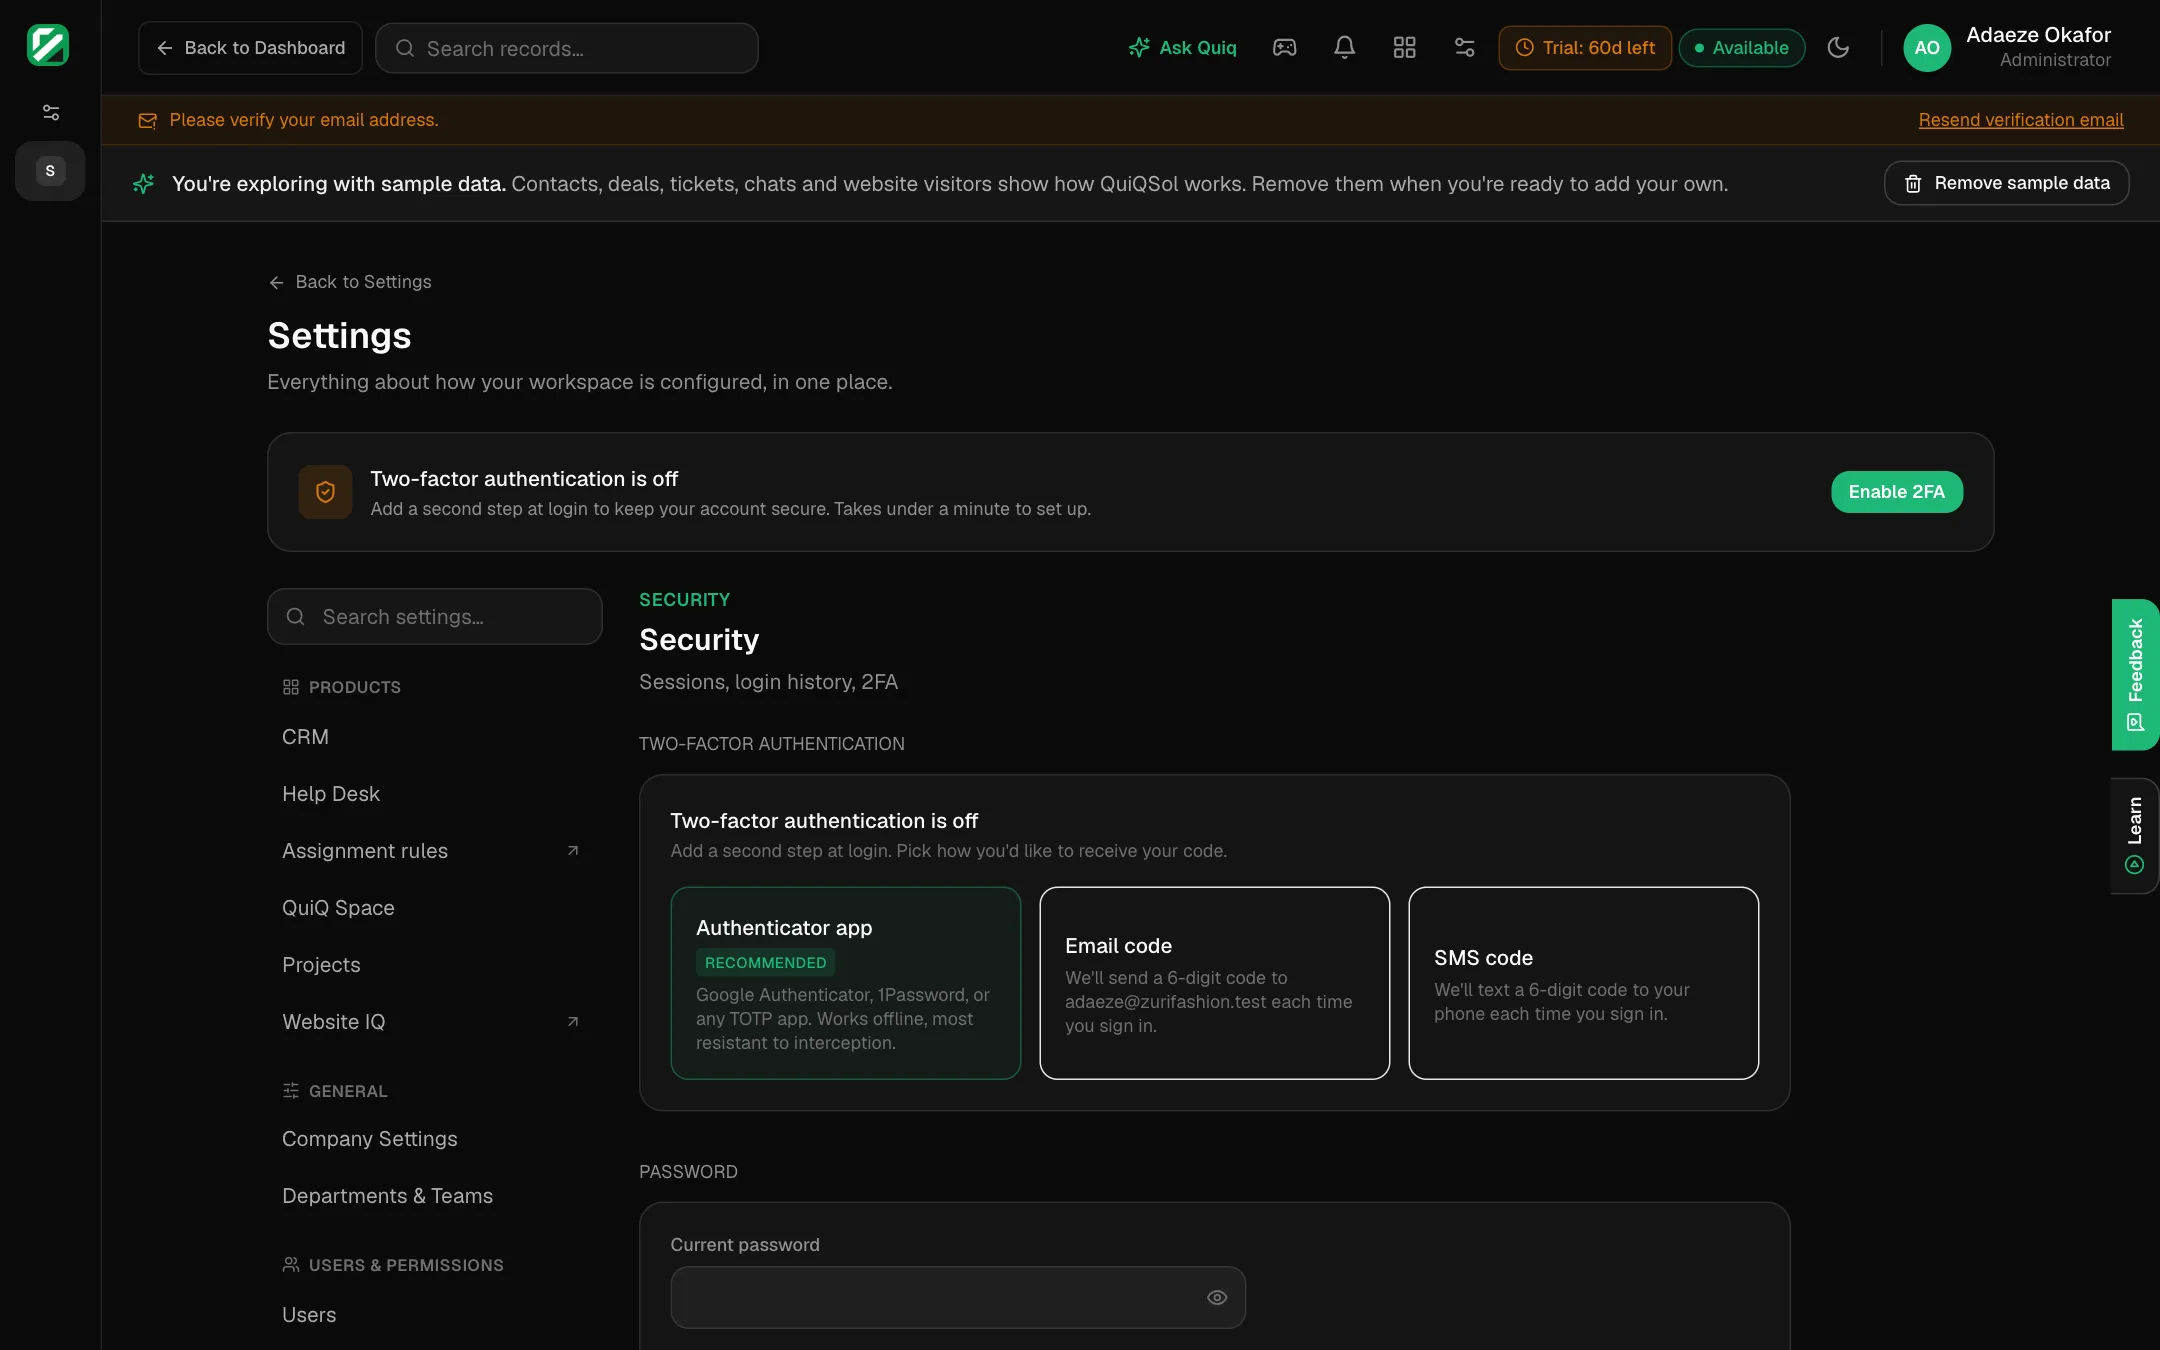 Two-factor authentication options
9. Choose your notifications
Open Settings → Notifications on each device you use:
- Install QuiQSol puts QuiQSol in its own window with its own icon on your phone or computer, like an app.
- Push alerts reach you even when QuiQSol is closed.
- Ringtone sets how QuiQ Space and WhatsApp calls ring. Press play to hear each one, then Use.
- Below these, choose which events alert you, such as a ticket assigned to you, a deal won or a meeting booked.
10. Your trial, plan and billing
Your trial gives you the Growth plan, with every product, for the number of days shown in the top bar. Nothing is charged during the trial.
Open the plans from the Trial badge in the top bar, or from Your account → Manage Plan. The Billing page shows your current plan, active seats and both plans side by side, priced per seat in Naira and paid through Paystack:
- Starter: CRM, Help Desk, Website IQ live chat, QuiQ Space and Knowledge Base.
- Growth: everything in Starter plus WhatsApp CRM, Marketing, Analytics, Social Intelligence, Projects, Automation and Invoicing.
- Enterprise: custom volumes, custom roles and dedicated onboarding. Click Talk to Sales.
Set the number of seats with the + and − buttons on a plan, choose Monthly or Annual (one month free), then check out. See Pricing for today's prices.
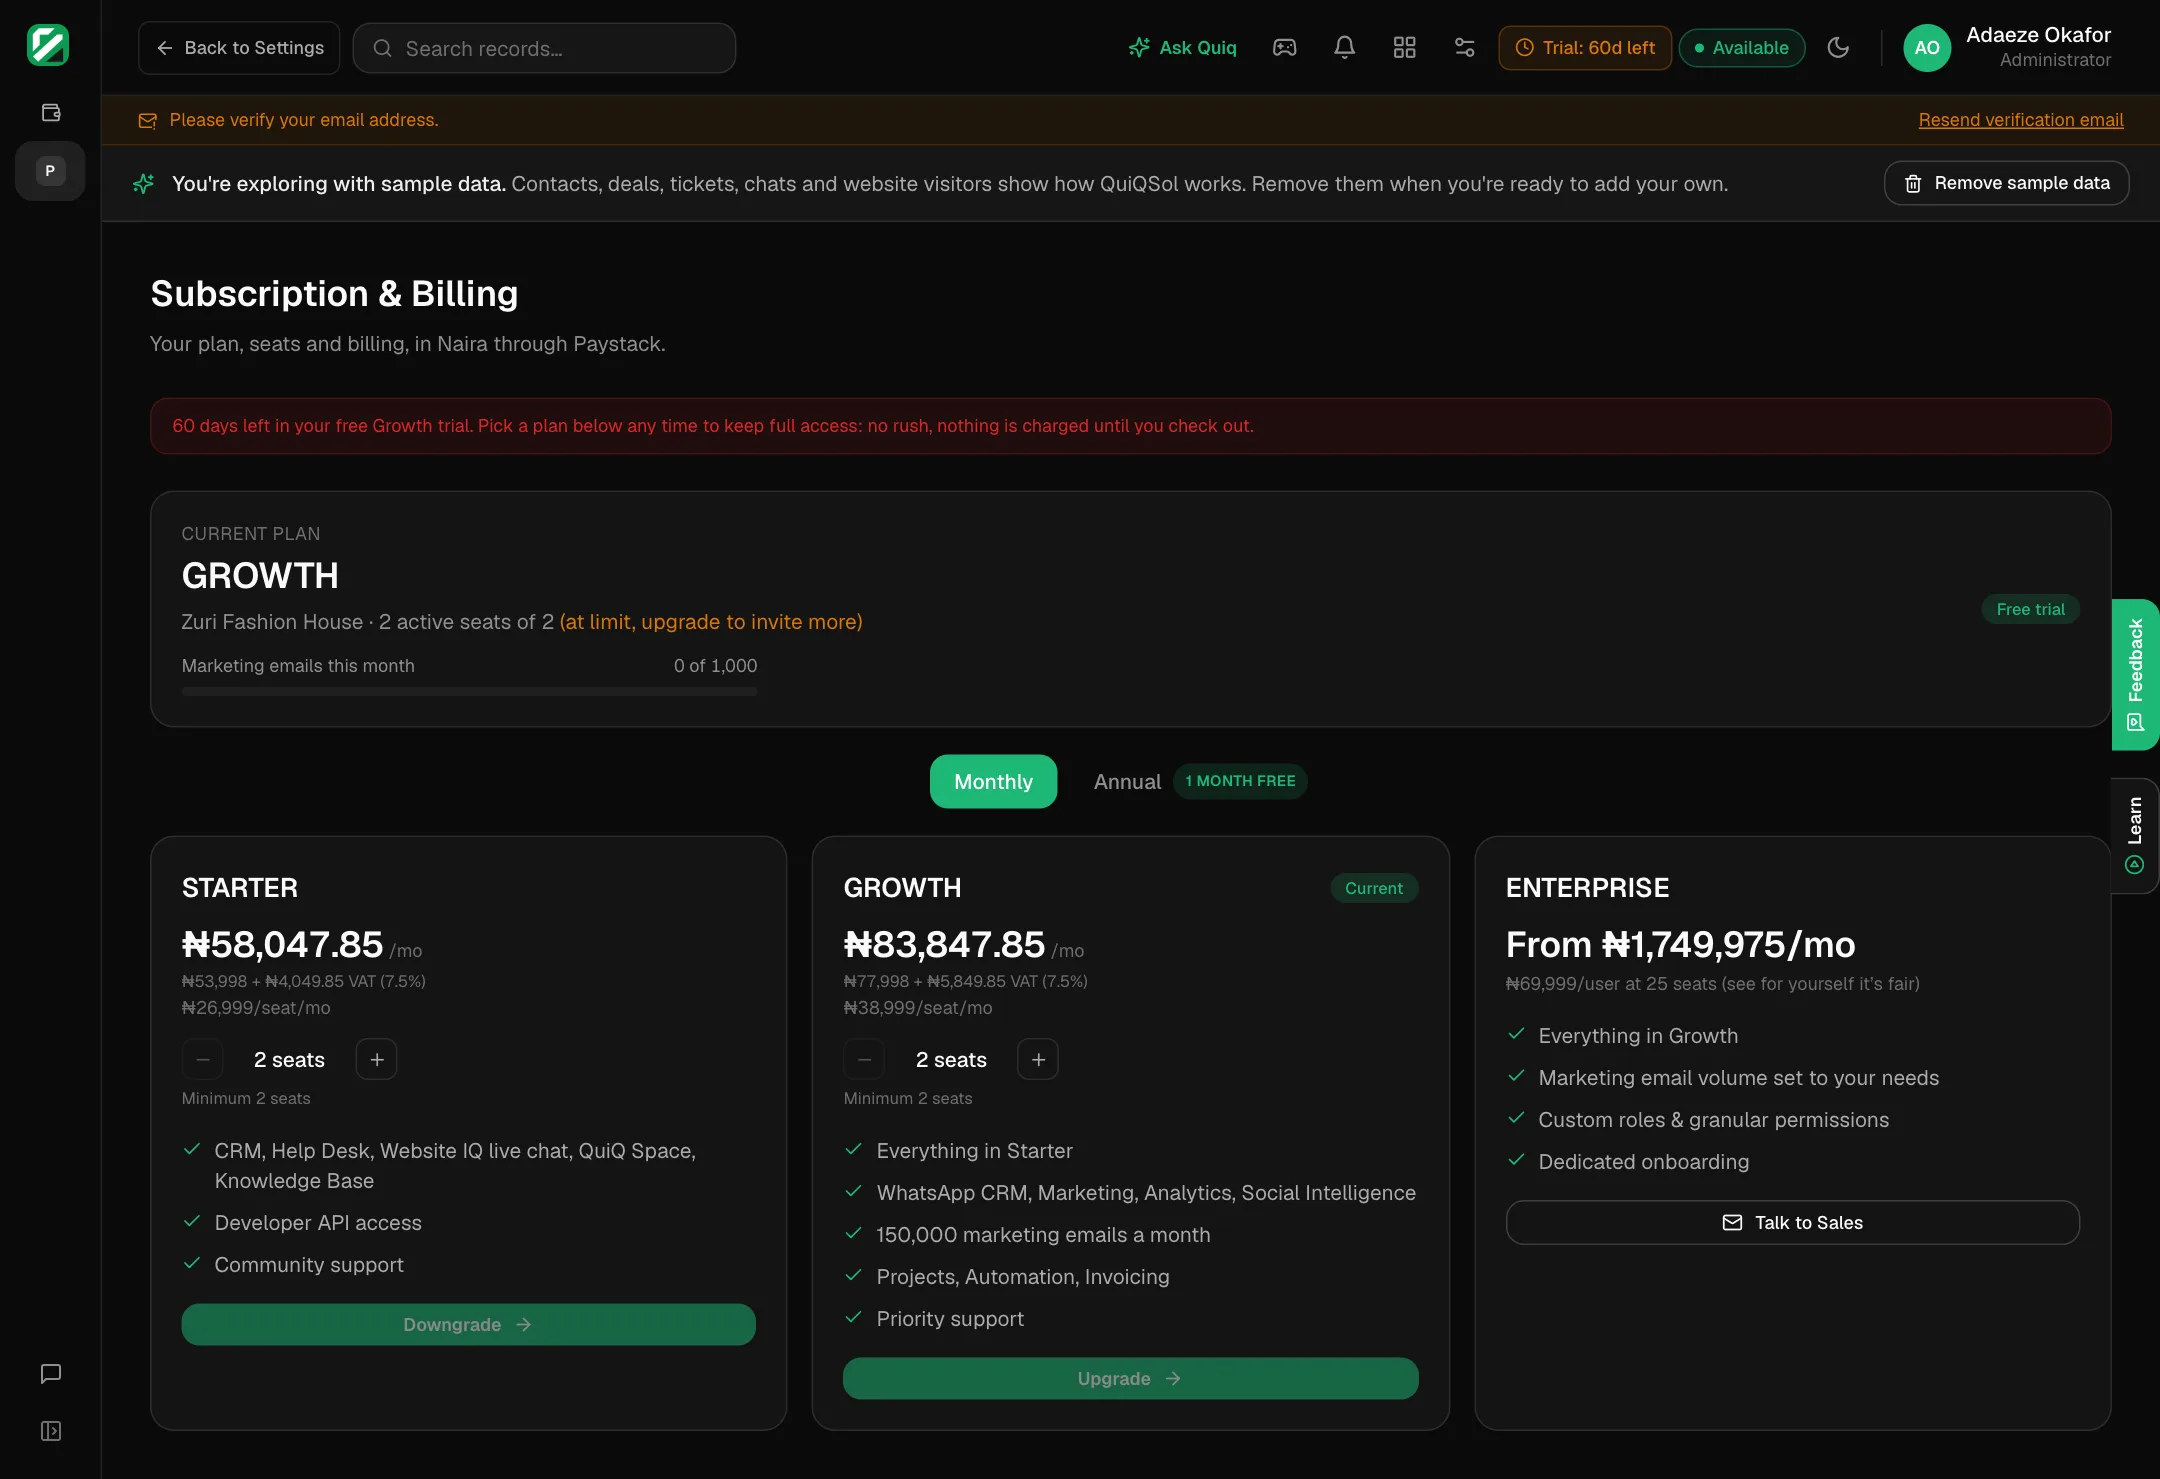 The Billing page
When the trial ends
Choose a plan to keep using QuiQSol. Your account and data stay exactly as you left them.
11. Get help any time
- Ask Quiq in the top bar answers how-to questions from these guides.
- Your account → Chat with Us reaches the QuiQSol team directly.
- Your account → Write to Us emails support@quiqsol.com.
- The Learn tab on the right edge has short product videos.
What to set up next
Pick the product you will use first:
- Set up Quiq WhatsApp CRM to sell and support on WhatsApp.
- Set up Quiq CRM for contacts, deals and your pipeline.
- Set up Quiq Help Desk to turn customer emails and chats into tickets.
- Set up Quiq Invoices to bill customers and get paid online.
- Set up Quiq Marketing to email your customers.